Deploy Docmost with Docker Compose, Traefik, and External PostgreSQL
Many documentation platforms charge per user, so the cost increases as your team grows. They also store your documentation and other data on their infrastructure, which can raise concerns about data privacy and control. Self-hosting Docmost lets you avoid per-user pricing and keep your documentation and data on infrastructure you control.
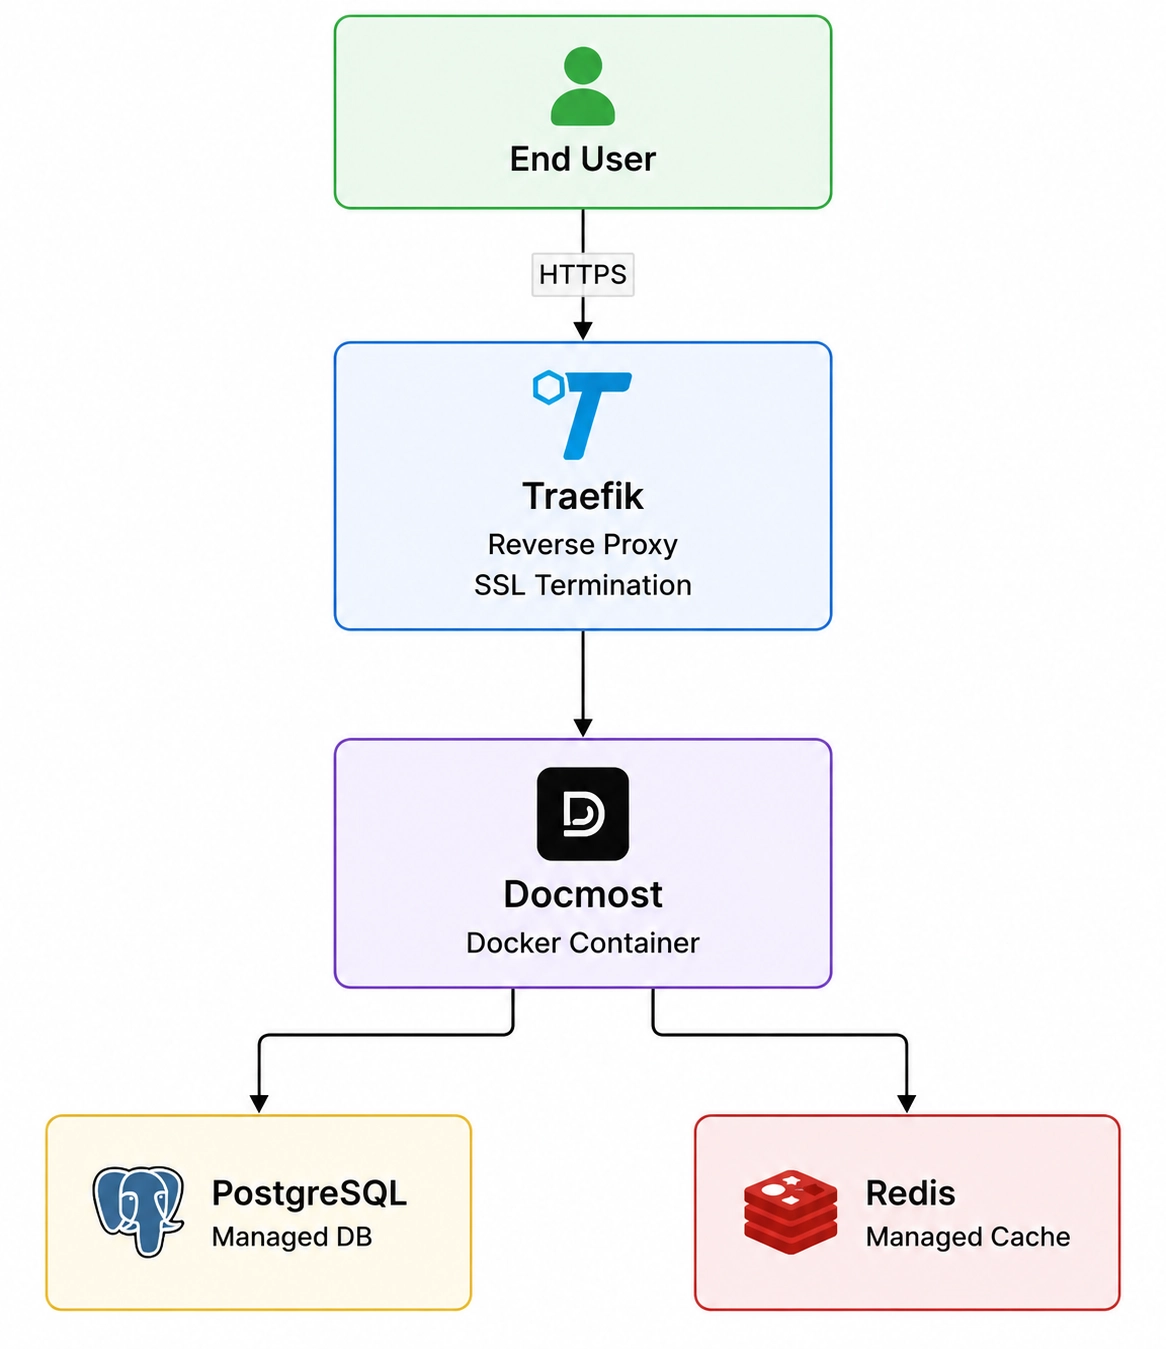
In this guide, we will set up Docmost using a safe and reliable production layout. We will use Docker Compose to run the application easily and Traefik to handle web traffic with automatic, free SSL certificates. We will connect Docmost to an external PostgreSQL database to separate application and database workloads while simplifying backups and recovery.
This article was tested on a live server before publication. Every command, configuration file, and verification step was validated on the final deployment to maintain accuracy.
Prerequisites
Before you begin, make sure you have these four things ready:
-
A Cloud Server: A Linux server with at least 2 vCPUs and 4 GB of RAM so the app runs smoothly.
-
Docker and Docker Compose: Installed on your server to run the application containers.
-
A Domain Name: A custom web address with an A Record pointing to your server's public IP address.
-
External PostgreSQL: A managed cloud database with your secure connection string ready to use.
Infrastructure Used
This guide was validated using the following infrastructure:
- Cloud Provider: DigitalOcean
- Operating System: Ubuntu 24.04 LTS
- Deployment Environment: Virtual Machine (Droplet)
This guide contains affiliate links. If you sign up through these links, I may earn a commission at no additional cost to you. I only recommend products and services that I personally use while testing my guides.
Architecture Diagram
Create a Non-Root Administrative User
Many cloud providers provide root access by default. While this is convenient for initial setup, production deployments are generally managed through a non-root user with sudo privileges. This follows Linux security best practices and reduces the risk of accidental system-wide changes.
-
Create a new user:
adduser USERNAMEReplace:
USERNAMEwith your preferred username.
-
Grant the user sudo privileges:
usermod -aG sudo USERNAMEReplace:
USERNAMEwith the username you created in the previous step.
-
Verify that the user has sudo access:
groups USERNAMEReplace:
USERNAMEwith the username you created in the previous step.
-
You should see output similar to:
USERNAME : USERNAME sudo -
Switch to the new user:
su - USERNAMEReplace:
USERNAMEwith the username you created in the previous step.
-
Verify sudo access:
sudo whoamiYou should see output similar to:
root -
Allow the user to manage Docker without using the root account:
sudo usermod -aG docker USERNAMEReplace:
USERNAMEwith the username you created in the previous step.
-
Apply the new Docker group to the current session:
newgrp docker
Step 1: Create the Project Directory and Environment Variables
Docmost uses environment variables to store application settings, database credentials, Redis connection details, and domain configuration. In this step, you'll create a dedicated project directory and define the variables used throughout the deployment.
-
Create the project directory and navigate to it.
mkdir ~/docmostcd ~/docmostThis directory will contain all files related to the deployment, including the Docker Compose manifest and environment configuration.
-
Generate a secure secret using:
openssl rand -hex 32Copy the output and paste this output in
APP_SECRET. -
Create the environment file.
nano .envAdd the following configuration.
# Website ConfigurationDOMAIN_NAME=doc.example.comAPP_URL=https://doc.example.comLETSENCRYPT_EMAIL=your_email@example.com# Global Application SecretAPP_SECRET=YOUR_GENERATED_SECRET# PostgreSQL ConfigurationDATABASE_URL=DATABASE_CONNECTION_STRING# Redis ConfigurationREDIS_URL=redis://redis:6379Replace the following values:
-
doc.example.comwith your domain name. -
admin@example.comwith your email address used for SSL certificate notifications. -
DATABASE_CONNECTION_STRINGwith your PostgreSQL connection string. -
YOUR_GENERATED_SECRETwith a generated secret.
-
Step 2: Create the Docker Compose Manifest
The deployment consists of three containers. Traefik handles HTTPS traffic and SSL certificate management, Docmost runs the application, and Redis provides caching and background job processing.
-
Create the Docker Compose file.
nano docker-compose.ymlAdd the following configuration.
services:traefik:image: traefik:v3.6command:- "--providers.docker=true"- "--providers.docker.exposedbydefault=false"- "--entrypoints.web.address=:80"- "--entrypoints.websecure.address=:443"- "--certificatesresolvers.letsencrypt.acme.httpchallenge=true"- "--certificatesresolvers.letsencrypt.acme.httpchallenge.entrypoint=web"- "--certificatesresolvers.letsencrypt.acme.email=${LETSENCRYPT_EMAIL}"- "--certificatesresolvers.letsencrypt.acme.storage=/letsencrypt/acme.json"- "--entrypoints.web.http.redirections.entryPoint.to=websecure"ports:- "80:80"- "443:443"volumes:- /var/run/docker.sock:/var/run/docker.sock:ro- letsencrypt:/letsencryptrestart: unless-stoppeddocmost:image: docmost/docmost:latestdepends_on:- redisenvironment:APP_URL: ${APP_URL}APP_SECRET: ${APP_SECRET}DATABASE_URL: ${DATABASE_URL}REDIS_URL: ${REDIS_URL}ports:- "3000:3000"restart: unless-stoppedlabels:- "traefik.enable=true"- "traefik.http.routers.docmost.rule=Host(`${DOMAIN_NAME}`)"- "traefik.http.routers.docmost.entrypoints=websecure"- "traefik.http.routers.docmost.tls.certresolver=letsencrypt"- "traefik.http.services.docmost.loadbalancer.server.port=3000"volumes:- docmost:/app/data/storageredis:image: redis:8command: ["redis-server", "--appendonly", "yes", "--maxmemory-policy", "noeviction"]restart: unless-stoppedvolumes:- redis_data:/datavolumes:docmost:letsencrypt:redis_data:
Step 3: Deploy the Application
Docker Compose will pull the required images, create the network and volumes, and start all services.
-
Start the deployment.
docker compose up -dThe first deployment may take a few minutes while Docker downloads the required container images.
-
Verify that all containers are running.
docker compose psYou should see the
docmost,redis, andtraefikcontainers in anUpstate. -
Review the application logs.
docker compose logsCheck the output for any startup errors related to PostgreSQL, Redis, or SSL certificate provisioning before continuing to the next step.
Step 4: Deployment Verification
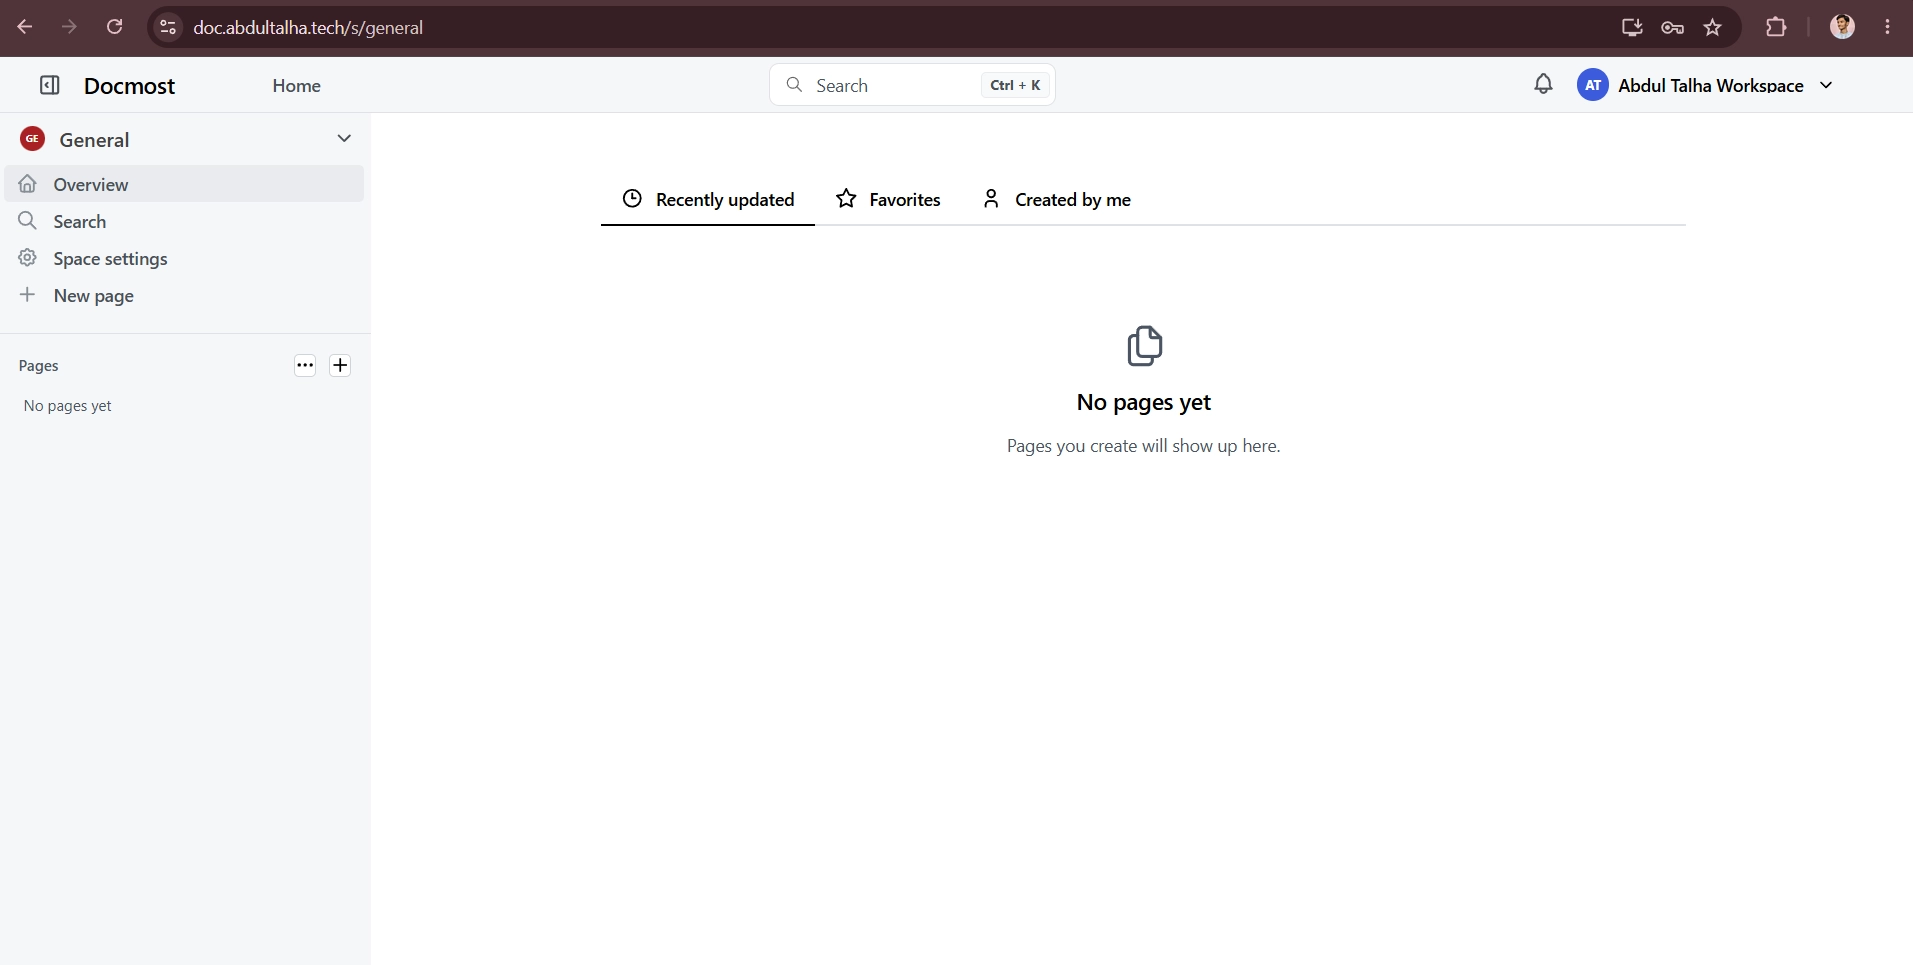
Once all containers are running, verify that Docmost is accessible through your domain and that Traefik has successfully issued an SSL certificate.
-
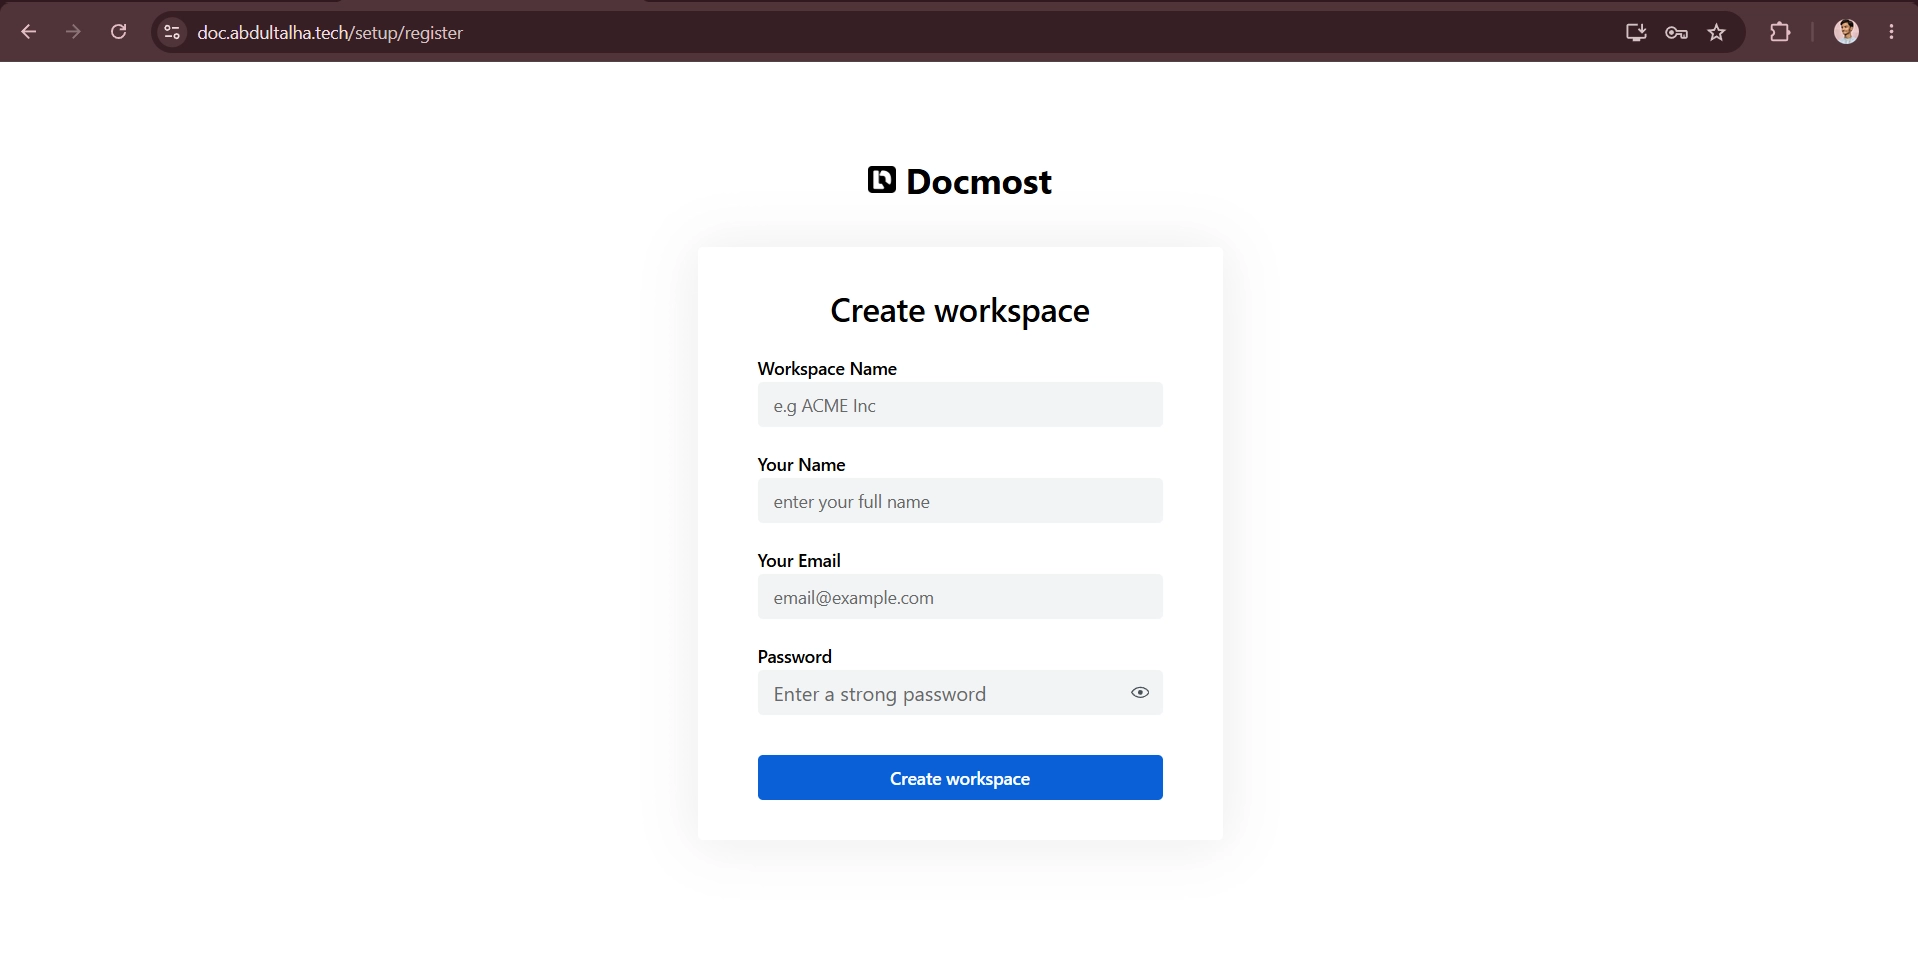
Open your browser and navigate to your configured domain.
https://doc.example.comReplace:
doc.example.comwith your actual domain name.
-
Create the administrator account by entering:
-
Workspace Name
-
Your Name
-
Your Email
-
Password
-
-
Click Create Workspace to continue.
-
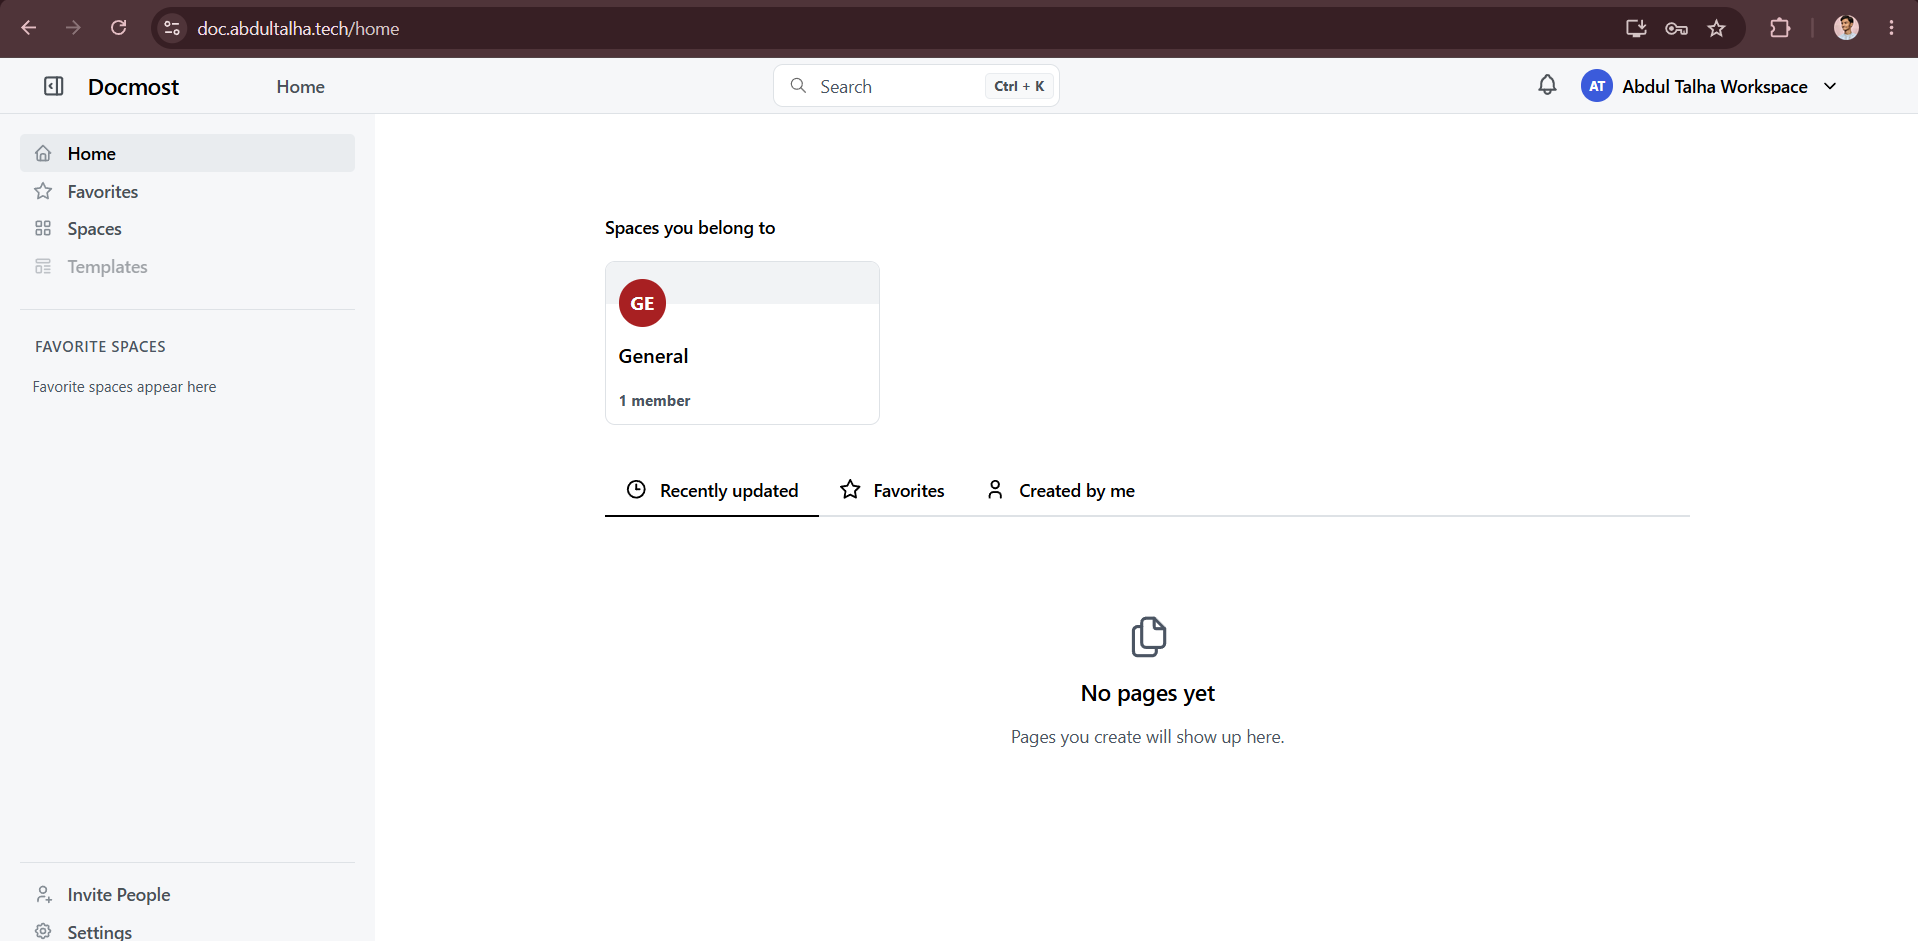
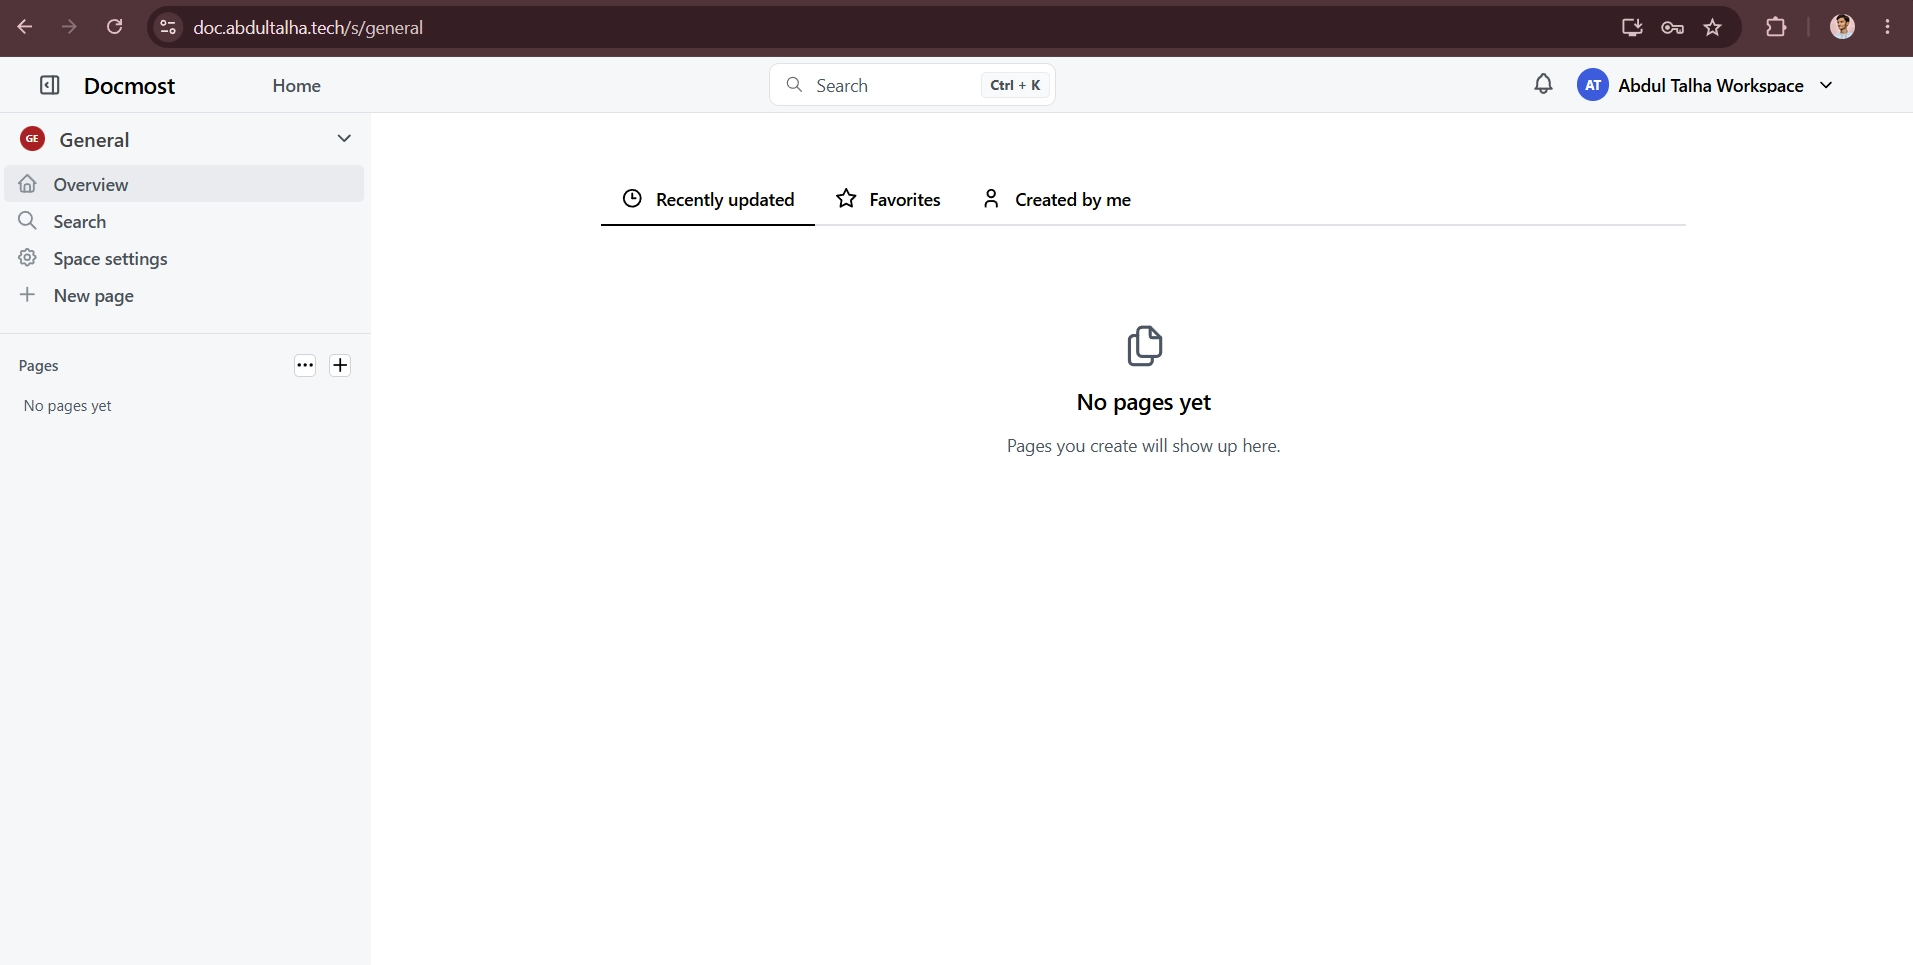
After creating the administrator account, create your first workspace. The workspace acts as the primary location for storing pages, documentation, and team content.
-
To confirm that HTTPS is working correctly, click the padlock icon in your browser's address bar and verify that the SSL certificate is valid.
Troubleshooting
-
Docker or Docker Compose Is Not Installed: If Docker or Docker Compose is not installed on the server, you'll see an error similar to the following when starting the deployment:
Command 'docker' not found, but can be installed with:snap install docker # version 29.3.1, orapt install docker.io # version 29.1.3-0ubuntu3~24.04.2apt install podman-docker # version 4.9.3+ds1-1ubuntu0.2See 'snap info docker' for additional versions.Fix: Install Docker and Docker Compose before proceeding with the deployment.
-
Domain Does Not Resolve to the Server: If the domain is not pointing to your server, you'll see an error similar to the following when accessing the application.
This site can't be reachedDNS_PROBE_FINISHED_NXDOMAINorERR_NAME_NOT_RESOLVEDFix:
-
Check DNS resolution using:
nslookup doc.example.comReplace
doc.example.comwith your domain. -
A successful lookup should return your server's public IP address.
Name: doc.example.comAddress: YOUR_SERVER_IP -
If the returned IP address is incorrect, update the A record in your DNS provider and wait for DNS propagation to complete.
-
-
SSL Certificate Is Not Issued: If Traefik is unable to obtain an SSL certificate from Let's Encrypt, you'll see a browser warning similar to the following:
Your connection is not privateNET::ERR_CERT_AUTHORITY_INVALIDorNET::ERR_CERT_COMMON_NAME_INVALIDFix:
-
Verify that the domain resolves to your server.
nslookup doc.example.comReplace
doc.example.comwith your domain. -
Check that ports 80 and 443 are open.
sudo ufw status -
If UFW is enabled, allow HTTP and HTTPS traffic.
sudo ufw allow 80sudo ufw allow 443 -
Review the Traefik logs for certificate-related errors.
docker compose logs traefik -
Once the DNS record is correct and the required ports are accessible, Traefik will automatically request and install a valid SSL certificate from Let's Encrypt.
-
-
PostgreSQL Connection Failed: If Docmost cannot connect to the PostgreSQL database, the application container may fail to start or repeatedly restart. You may see errors similar to the following in the container logs:
error: password authentication failed for userorconnect ECONNREFUSEDordatabase does not existFix:
-
Verify that the
DATABASE_URLvalue in the.envfile is correct.DATABASE_URL=postgresql://USERNAME:PASSWORD@HOST:PORT/DATABASE?sslmode=require -
Test the connection directly from the server using:
docker run --rm -it postgres:alpine psql "postgresql://USERNAME:PASSWORD@HOST:PORT/DATABASE?sslmode=require" -
If the connection succeeds, you'll see a PostgreSQL prompt similar to:
-
psql (17.x) SSL connection established
-
Review the Docmost logs for additional database-related errors.
docker compose logs docmost -
Correct any connection string issues and restart the application.
docker compose restart docmost
-
Further Steps
Your Docmost instance is now running and ready to use. Depending on your requirements, you may want to configure additional features such as user invitations, email notifications, object storage, authentication providers, and other application settings.
For a complete list of supported environment variables and configuration options, refer to the official Docmost documentation:
Docmost self-hosting environment variables
Conclusion
In this guide, you deployed Docmost using Docker Compose with Traefik for automatic HTTPS and an external PostgreSQL database for persistent data storage. You configured the required environment variables, created the Docker Compose stack, deployed the application, and verified that the installation was working correctly.
Before opening your Docmost instance to a wider group of users, the next step is to secure the deployment. The Secure Docmost guide covers HTTPS, environment variables, authentication, and access controls to help you secure your self-hosted instance.